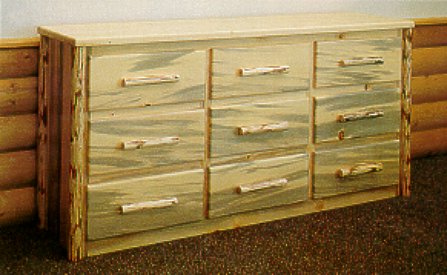
Staining Unfinished Log Furniture

You can purchase log furniture already finished or unfinished and do the job yourself. When your log furniture is unfinished, it will need to at least have a sealer put on it to preserve the wood so the piece lasts as long as possible. Many people opt to stain their unfinished log furniture to add depth and character to the wood grain. Staining unfinished log furniture is easy to do and ensures your piece will last for many years.

Staining your unfinished log furniture is a rewarding experience. Of course, if you're not the do-it-yourself type, LodgeCraft sells a wide range of log furniture that's already finished and ready to use.
Step 1. Plan and Prepare
Before you begin a project like this, it is important that you prepare your surroundings to make the job easier. If you're working indoors, be sure to place a drop cloth underneath your work area to protect the floor. Also, be sure you have proper ventilation as some stains can be quite noxious in enclosed spaces. If you are working outside, be sure your work area is protected from the elements - your piece will need time to dry once you're done, so be sure the area you're working in stays dry for several hours to a couple of days.Step 2. Clean the Piece
Before you can begin staining, you need to make sure the log furniture is clean. You can do this by lightly sanding the surface of the piece and removing any dirt, debris and sanding dust from cracks and crevices. If you're working on log furniture such as nightstands or dressers, be sure to remove each drawer and sand each individual part for the best, most even results.
Step 3. Test
When you pick out your stain, the color you see at the store isn't always the color you actually achieve when you stain your furniture. There are several factors that influence the stain's finished color, so it's best to do a small test on the underside of the piece before tackling the entire project. Find a spot that isn't visible during normal use and apply a small area of stain. Once it dries, you'll be able to see just what the color will be and can decide if it's what you're going for.Step 4. Stain
If your test spot is just what you want, it's time to begin staining the whole piece. Start on the underside of the furniture where you did the test patch so you can get the hang of applying the stain in a not-so-obvious place. Take care to avoid overlapping strokes if you're using a brush because the finish will be uneven. You can also use a rag to apply the stain, but if you use this method, be sure to wipe any excess stain off with a clean rag after rubbing it into the wood. Once you've finished the underside of the piece, move on to the sides and finish with the top.Step 5. 2 Coats
For a robust finish, you can apply a second coat of stain and then finish with a sealer coat. Wait until the first coat is completely dry before applying the second, and of course, wait until the second coat is dry before applying the sealer. A sealer coat will help your log furniture's new finish last a long time.Staining your unfinished log furniture is a rewarding experience. Of course, if you're not the do-it-yourself type, LodgeCraft sells a wide range of log furniture that's already finished and ready to use.